The GPR Loader is a step-by-step guide to help you assemble profiles and process them, and then compile the processed profiles into 3D tiles to be sliced using the
GPR Tab of the Survey Tool. Reflection profiles and slices can be viewed as you go through the processing steps, and you can go back and undo or change previous steps before you finish. This allows you to create the best possible processing sequence for each dataset.
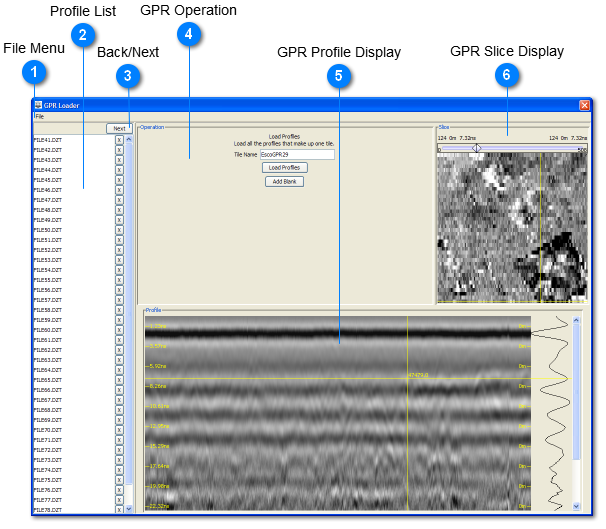
The following describes the main features in the GPR loader that remain constant through each processing step (operation).
Loading and processing GPR data in ArchaeoFusion is done in the following order (steps can be skipped, but follow a rigid order to simplify things):
-
-
-
-
-
-
-
-
-
-
-
Repeat or Finish and go back to Survey Tool to create slices.
Subtopics 4.5.1 - 4.5.10 describe each of these steps.
 File Menu
The File Menu has 3 options:
-
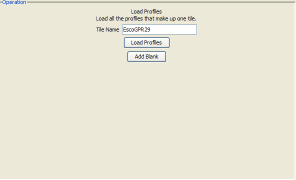
New - Reset the GPR Loader to start at the beginning with loading profiles.
-
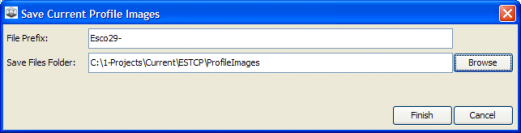
Save Profile Images - Use this to save each reflection profile as a TIFF image. Enter a file prefix and browse to a folder in which to save the files. Click Finish. This can be done at any stage in the GPR loader, and can be used to save out raw and processed versions of profiles for later comparison and reports.
-
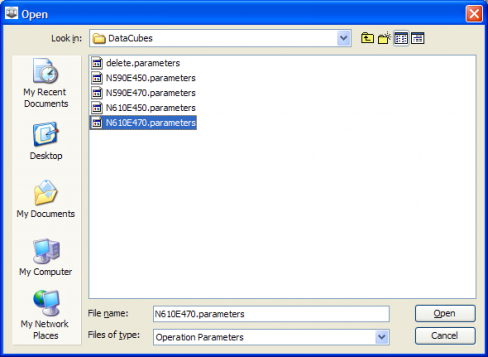
Load Parameters - Use this to load all the GPR Loader settings used for processing another GPR dataset (tile). This can be used during any part of the GPR loader sequence. Files storing these parameters are saved in the DataCubes subdirectory in the Project folder.
|
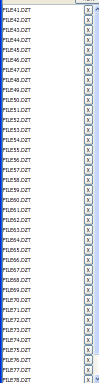
 Profile List
A list of profiles is provided along the left pane of the GPR loader. The profiles can be re-ordered and deleted, and displayed by selecting them.
|
 Back/Next
The Back button (present in all subsequent steps) allows you to go back to a previous step to modify your processing.
The Next button completes the displayed operation and takes you to the next one.
|
 GPR Operation
The central-upper pane in the GPR Loader changes for each operation, giving the name, parameters dialog, and displaying needed aspects of an operation.
|
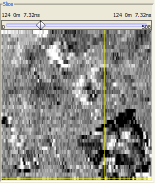
 GPR Profile Display
The selected profile is displayed in this window for all steps. Time is displayed along the left axis, and meters along the right. An o-scope view is also shown in the far right. When you click on a profile the yellow cross-hairs move to that location and also show you the corresponding location on a slice map of the data (see next part). Hold the mouse button down and drag vertically to watch the slice change in an animation. Click and hold the right mouse button to create a thicker slice in the Slice Display window.
|
 GPR Slice Display
A slice of the GPR data is always displayed in this window, and corresponds to the location of the cross-hairs on the profile. Use the slider bars above the slice to adjust the slice position and thickness, and drag the bar between the two triangles from left to right to see how slices change with time and/or depth.
|