|
4.1.2 Using the Survey List
SEE ALSO: Survey Menu
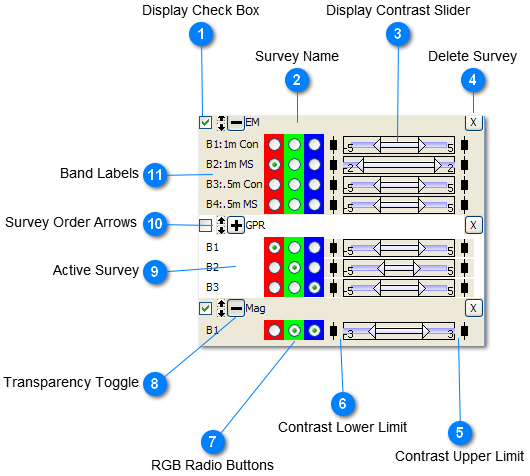
 Display Check Box
must be checked for the survey to display in the main viewing window. (a default/ellipsoid surface must also be displayed; see Mapping Surfaces for details).
|
 Survey Name
The name given to the survey is displayed here. This can be changed at any time in the Survey Tool.
|
 Display Contrast Slider
Display contrast is controlled by clicking and dragging the upper and lower display limits (triangles) OR by entering minimum and maximum standard deviations (right click on each triangle, enter the number, then press Enter). The whole slider bar can also be dragged by its center by left-clicking thee, holding, and dragging the mouse left and right.
|
 Delete Survey
Click this button to delete the survey. This completely removes the survey so make a copy of it and save somewhere else if you plan on using it later. Surveys are found in the Project\Surveys directory. They are a collection of files inside a folder so you must copy the entire directory if you want to use it later.
|
 Contrast Upper Limit
Set the upper limit for contrast adjustment here, which makes the display contrast sliders (see above) more or less sensitive when moved. If you decrease the contrast range by using the contrast upper and lower limits, the contrast sliders will adjust at a finer level. You can change the value by dragging the black box or right-clicking on it and entereing a value, then enter.
|
 Contrast Lower Limit
Set the lower limit for contrast adjustment here, which makes the display contrast sliders (see above) more or less sensitive when moved. If you increase the contrast range by using the contrast upper and lower limits, the contrast sliders will adjust more coarsely. You can change the value by dragging the black box or right-clicking on it and entereing a value, then enter.
|
 RGB Radio Buttons
Surveys can be displayed using separate red, green and blue bands by turning each radio button on and off. It works best to do this while using a grayscale pallette (see Colormap Menu). A single band can be displayed as red, green, blue, yellow (red plus green), magenta (red plus blue), or cyan (green plus blue). Up to three bands in the same survey can be displayed simultaneously by color combinations (just select one color per band). Bands from different surveys can also be shown simultaneously using color combinations and the Transparency Toggle Button (see below).
|
 Transparency Toggle
Click this button to make a survey transparent. The minus sign indicates that the survey is transparent and can be viewed along with any other transparent survey (in other words, all surveys must have a minus sign in order to view on top of the others). Click again to change back to a plus sign if you want the survey to be opaque again.
|
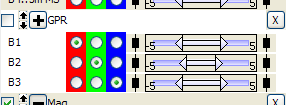
 Active Survey
The active Survey is highlighted white, while all other surveys are tan. When a survey is active it's operation stack is displayed in the lower part of the panel. Note that a survey can be unchecked (not displayed) but still active. When processing a survey make sure it is active and displayed in order to see the results in the main viewing window.
|
 Survey Order Arrows
 Use these arrows to move surveys up and down in the list. Surveys at the bottom of the list are displayed on the top in the main viewing window.
|
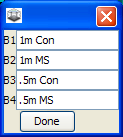
 Band Labels
All bands are named B1, B2, B3, etc for Band 1, Band 2, Band 3, etc. To add names to these right click in this space and select Edit Band Labels, then enter the labels in the dialoge (shown below) and click done
|
|
|