|
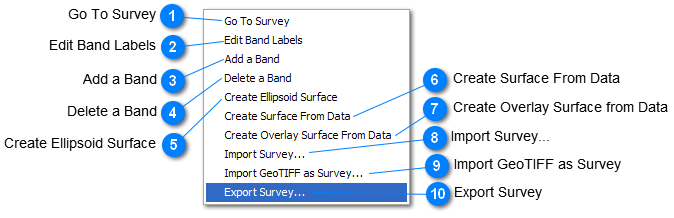
 Go To Survey
Select Go To Survey to bring the viewing window back to a vertical view centered on the center of the selected survey, with grid north pointing up. This can be done from this menu or by right clicking on the survey in the Survey List. This is useful if you lose track of a survey after panning around. Go To Survey does not set the zoom level, however, so if you have zoomed out too far the survey will not be visible until you zoom back in. |
 Edit Band Labels
All bands are named B1, B2, B3, etc for Band 1, Band 2, Band 3, etc. Use this menu item to modify or add names for bands. This function is also availably from the right-click menu when the mouse is positioned over a survey in the Survey List. See Band Labels for more information. |
 Add a Band
|
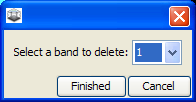
 Delete a Band
This function deletes a band. Select the band number to be delted and click Finished.
|
 Create Ellipsoid Surface
This function creates a new ellipsoid (also called default) surface in the list of Mapping Surfaces. Default surfaces are created when a new survey is created, but this function creates a new one. This might be necessary when surveys are moved to a new spatial location or expanded by adding more tiles. If a survey is only partly displayed it may be because the mapping surface is not large enough and a new one must be created. This function is also availably from the right-click menu when the mouse is positioned over a survey in the Survey List.
|
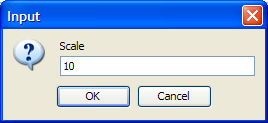
 Create Surface From Data
This function creates a surface or height map of a survey. Enter an exaggeration factor (scale) in the dialogue (see below) and click ok.
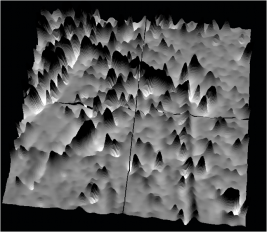
The new height map will be automatically displayed, with surveys draped overtop. Using this function, a surface of one survey can be created, and then another survey draped overtop to see how the two correspond.
Example of Surface data (height map) with a survey draped overtop.
This function is also availably from the right-click menu when the mouse is positioned over a survey in the Survey List.
|
 Create Overlay Surface from Data
This works the same as Create Surface From Data (above), but when displayed simultaneously with a surface (height map), the height maps are added, so you see how the overlay surface lies on top of another surface. When displayed alone, the overlay surface looks the same as a surface (height map), but when it is displayed at the same time as a regular surface it will be overlaid on top.
This function is also availably from the right-click menu when the mouse is positioned over a survey in the Survey List.
|
 Import Survey...
A survey from a different project can be imported using this function. In the browsing dialogue, be sure to select the survey directory (folder, or parent directory for that survey), then click Select Survey Directory.
|
 Import GeoTIFF as Survey
A GeoTIFF formatted file can be imported as a survey using this option. In the browsing dialogue select the GeoTIFF file and click Select GeoTIFF file.
|
 Export Survey
Surveys can be exported in the following ways.
-
File Name: Enter a name for the exported file to be created.
-
by image size (pixels) - select this option to enter the desired X and Y dimensions (number of columns and rows) of the output image. The data will be resampled to fit the dimensions entered (unless you enter the same dimensions as survey you are exporting).
-
by pixel size (meters) - select this option to enter the desired pixel size in X and Y dimensions. The data will be resampled to the entered pixel size (or will remain the same if you enter the same pixel size as the current survey)
output buttons:
File Format:
-
GeoTIFF files are lossless and versatile and can be created from WYSIWYG or Data outputs. This format is suggested if the survey is registered in ArchaeoFusion in real world coordinates, so it can be imported easily into GIS.
-
PNG is a lossless image format available if you choose to export WYSIWYG. These files can be used in documents as well as imaging and GIS software. PNG files go into ArcGIS without any conversion. This format is recommended for use with ArcGIS if real-world coordinates (Lat/Long, UTM) are not being used.
-
select Data if you would like to export the data without display contrast (keeping the actual data values intact).
-
Surfer Grid (ASCII) files are simple, space-delimited text files of the data that will open directly in Surfer software. One line of the header can also be modified to make the data go into ArcGIS as an Arc Raster Grid.
After making desired selections, click Finish.
All exported files are saved in the Project directory (the parent folder for an ArchaeoFusion project).
|
|
|