|
4.4.4 Using the Basic Tab
 Name the Survey
Enter a name for the Survey
|
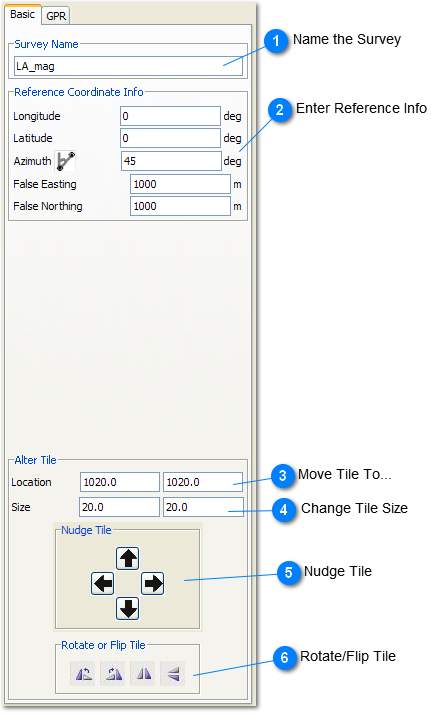
 Enter Reference Info
Enter X and Y coordinates in whatever coordinate system you are using (change the coordinate system in the Preferences dialog. The labels written here will match the selected coordinate system. In the example here, the geodetic coordinate system is being used, so the coordinates should be Longitude and Latitude. However, if you do not have any real-world coordinates you should choose the geodetic coordinate system under Preferences and enter 0,0 for Longitude and Latitude (as shown above). Do not worry about these being wrong. The reference coordinates are only to mark the location of the lower-left corner of the survey,
Enter an Azimuth for grid north, if known. ArchaeoFusion maintains two types of "north". Grid north is always up relative to the survey as it is assembled in the Survey Took, which the azimuth is a compass bearing for the orientation of the grid. In the example above, the azimuth is 45 degrees. This is the reading on a compass when you stand in the lower-left corner of the grid as shown in the Survey Tool and face toward grid north, or whatever direction is "up" in your survey grid. Check the north arrow in the Assembler to verify the Azimuth.
A False Easting and Northing can also be entered. These are arbitrary coordinates assigned to the survey origin, and provide a means of using a local plane coordinate system in addition to a real-world system. In the Main Window, right-clicking the mouse on top of the survey will give values for both sets of coordinates. If not false easting and northing were used, enter 0, 0 here.
|
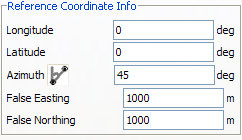
 Move Tile To...
Tiles can be moved with a mouse in the Assembler, but can also be placed in an exact location by entering X and Y grid coordinates here and pressing enter.
|
 Change Tile Size
To change the size of a tile, enter a new size in meters (x,y) and press enter. a tile can be resized to correct for errors in import or data collection.
|
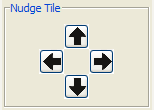
 Nudge Tile
Use these arrows to move selected tiles according to the snap size. Each click moves a tile from one grid line to the next. |
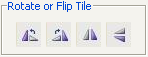
 Rotate/Flip Tile
Click these buttons to rotate a tile counterclockwise or clockwise, or flip (create a mirror image of a tile) it horizontally or vertically. A file's metadata are modified to reflect any changes made. If the Display Tile Name box is checked, the history of these changes is also displayed for the current Survey Tool session (information is cleared when you click Finished).
|
|
|